
You tap the MicroG APK on your new phone and nothing good happens. No install screen, or an install that dies halfway, or a blunt refusal with no useful reason. If that phone runs Android 14, 15, or 16, the first suspect is usually not the APK file — it is the newer security rules Android itself added around sideloading. Each recent Android version has tightened what an app installed outside the Play Store is allowed to do, and MicroG, which replaces Google Play Services, sits exactly in the category those rules watch most closely.
The good news: none of this needs root. In almost every case the fix is either a permission you have not granted yet, or installing through ADB — Android’s own developer bridge — which bypasses the on-screen installer and tells you the real reason when something fails. And if you have no computer, Shizuku gives you ADB-level commands directly on the phone.
The short answer: On Android 14, 15, and 16, a MicroG install is most often blocked by one of four things: the app doing the installing has not been allowed to install unknown apps, Play Protect or a brand security layer (Samsung Auto Blocker, MIUI Optimizations) is stopping it, an older MicroG build is already installed under the same package name, or — only for very old MicroG builds — Android 14’s block on apps targeting below SDK 23. Try the normal permission fixes first; if those fail, install with adb install from a computer, or with Shizuku on the phone itself. ADB also prints the exact error, so you stop guessing.
First, work out which blocker you actually have
Android’s on-screen installer is deliberately vague, so do not trust the message alone. Match what happened to you against this table before you start changing settings — the wrong fix wastes an evening.
| What happens | Most likely blocker | Go to |
|---|---|---|
| Nothing happens, or you are sent to a settings page | Install unknown apps not allowed for that browser or file manager | Fix 1 |
| “Blocked by Play Protect” or a brand security warning | Play Protect or a brand layer flagging the Play Services package name | Fix 1 |
| “App not installed” with no other detail | An older MicroG build already installed with a different signature | Our package-conflict guide (linked below) |
| Install fails only for a very old MicroG or Vanced-era build | Android 14’s block on apps targeting below SDK 23 | Fix 2 (the bypass flag) |
| You cannot grant MicroG a permission afterwards — the toggle is greyed out | Restricted Settings, applied to sideloaded apps since Android 13 | Fix 1, final step |
Also check two basics before anything else: your Android version at Settings → About phone → Android version, and that you are installing a current MicroG file. Get it from our MicroG download page or the project’s official pages at microg.org. An old build downloaded from a random mirror can fail for reasons that have nothing to do with your phone.
Fix 1: Clear the normal on-screen blockers first
Do these in order. Most people never need ADB at all — they just never granted the right permission, because Android now asks per app rather than once for the whole phone.
- Allow unknown apps for the app doing the installing. Go to Settings → Apps → Special app access → Install unknown apps, find your browser or file manager, and turn it on. Note the trap: allowing Chrome does not allow your file manager. Whichever app you tap the APK from is the one that needs the permission.
- Deal with Play Protect honestly. Play Protect flags MicroG because it uses the Play Services package name,
com.google.android.gms. That warning is a prompt to check your source, not a button to tap blindly. Only proceed when you are certain the file came from the official project or our download page. If you do proceed, the install screen itself offers the option to install anyway. - Turn off the brand layer, temporarily. On Samsung, Settings → Security and privacy → Auto Blocker blocks sideloading while it is on — turn it off for the install and back on afterwards if you use it. On Xiaomi, Redmi, and POCO, Settings → Additional settings → Developer options → MIUI optimization can block installs; note its original setting before toggling it so you can restore it. On Realme and OPPO, check the install-blocking toggles under Settings → Password & security → System security.
- Free up storage. Android can silently fail an install when storage is nearly full. Keep at least 1 GB free before retrying.
- Fix greyed-out permissions with Restricted Settings. Since Android 13, apps installed outside the Play Store get “Restricted Settings”: some sensitive permissions cannot be granted until you explicitly allow it. Go to Settings → Apps → MicroG → (three-dot menu) → Allow restricted settings, then grant the permission. This matters after install, not during it — if MicroG cannot get the permissions it needs, it will look installed but behave broken.
If the install still fails after Fix 1, stop tapping the same file and hoping. Move to ADB: it bypasses the on-screen installer entirely and, crucially, it tells you why it failed.
Fix 2: Install with ADB from a computer (the reliable method)
ADB (Android Debug Bridge) is Google’s own developer tool. It does not root your phone, does not wipe it, and does not void anything by itself — it simply installs the APK through a channel that the on-screen restrictions do not gate in the same way, and it prints the real error when something is genuinely wrong.
- On the phone, enable Developer options: Settings → About phone → tap Build number 7 times. Then turn on USB debugging in Developer options.
- On a computer, install the platform-tools package (from Google’s official Android developer pages) and connect the phone with a USB cable. Accept the “Allow USB debugging?” prompt on the phone, and tick “Always allow from this computer” only if it is your own computer.
- Confirm the connection:
adb devices— your phone should appear as “device”, not “unauthorized”. If it says unauthorized, unplug, revoke authorizations in Developer options, and accept the prompt again. - Install the file:
adb install path/to/microg.apk— use the real file path on your computer. A successful install printsSuccess. - If the install is an update over an existing MicroG of the same signature, add
-rto keep data:adb install -r path/to/microg.apk. - If — and only if — you are installing a very old build and ADB reports the low-target-SDK block, Android 14’s bypass flag exists for exactly this case:
adb install --bypass-low-target-sdk-block path/to/microg.apk. Android 14 blocks installation of apps targeting below SDK 23 (Android 6.0) because old target levels dodge modern permission rules. Current MicroG builds target modern Android and should not hit this block at all — so if a current file hits it, suspect the file, not the phone. Use the bypass only for an old build you deliberately want, from a source you trust.
One Xiaomi extra: on MIUI and HyperOS, USB debugging alone is sometimes not enough for ADB installs. In Developer options, also enable USB debugging (Security settings) if your phone shows it — without it, ADB commands can be silently refused even though the device appears connected.
Fix 3: No computer? Use Shizuku on the phone itself
Shizuku is an open-source app that lets other apps run ADB-level commands on the phone, without root and without a computer. It works through Android’s wireless debugging, which is why it needs Android 11 or later. This is the method for the common Indian scenario: the phone is your only device, and there is no laptop in the house.
- Install Shizuku from the Play Store or F-Droid. Also install a Shizuku-compatible terminal app (for example aShell from F-Droid) — that is the app you will type commands into.
- On the phone, enable Developer options as above, then turn on Wireless debugging in Developer options. Note: on many phones this toggle stays greyed out until Wi-Fi is on and connected to a network — your home Wi-Fi, or even your own hotspot, is enough. It does not need internet access beyond the local connection.
- In Shizuku, tap Pairing under “Start via Wireless debugging”. In Developer options, tap Wireless debugging → Pair device with pairing code. A 6-digit code appears.
- Enter that code in Shizuku’s notification prompt and tap Send. Then tap Start in Shizuku. When it reports running, open your terminal app and grant it Shizuku access when asked.
- Practical tip that saves most first attempts: do not leave the pairing-code screen before entering the code. Android rotates the port and invalidates the code when you navigate away, so use split-screen — Shizuku on one half, Developer options on the other — or enter the code from the notification shade without leaving the screen.
- In the terminal, install the APK from the phone’s own storage. First copy the APK somewhere simple, such as the Downloads folder, then run:
pm install /sdcard/Download/microg.apk(adjust the filename to your actual file). A successful install printsSuccess.
Two honest limits. First, on a non-rooted phone Shizuku stops when the phone reboots — you repeat the Start step after a restart, though pairing usually survives. Second, Shizuku is not a magic key: it runs the same package manager as ADB, so it cannot install over a conflicting old MicroG build either. If pm install reports a signature or update-incompatible error, the old build still has to go first — see our package-conflict guide.
Read the error: the ADB error decoder
When ADB or Shizuku fails, the last line is the diagnosis. This table covers the ones MicroG users actually meet:
| Error | What it means | What to do |
|---|---|---|
INSTALL_FAILED_UPDATE_INCOMPATIBLE |
Old MicroG installed, different signature | Uninstall the old build completely, for all users — see our “App not installed” package-conflict fix |
INSTALL_FAILED_VERSION_DOWNGRADE |
The file is older than the installed build | Get a newer build, or uninstall the old one first |
INSTALL_FAILED_DEPRECATED_SDK_VERSION |
Build targets below Android 14’s minimum (SDK 23) | Use a current build, or the --bypass-low-target-sdk-block flag for a deliberate old build |
INSTALL_FAILED_INSUFFICIENT_STORAGE |
Not enough free space | Free at least 1 GB and retry |
INSTALL_FAILED_INVALID_APK / “package appears to be invalid” |
Corrupt or incomplete download | Re-download on stable Wi-Fi from the official source |
INSTALL_FAILED_USER_RESTRICTED |
A brand or security layer refused the install | Recheck Fix 1: Auto Blocker, MIUI optimization, or the Xiaomi USB security setting |
After it installs: verify, don’t assume
An install screen that says Success is only half the job on newer Android, because background restrictions can still quietly cripple MicroG afterwards.
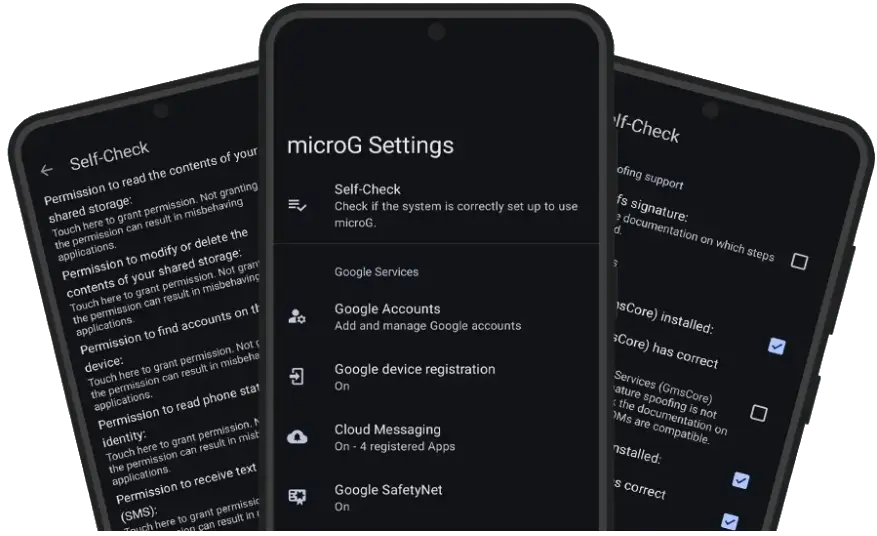
- Open MicroG Settings → Self-Check and confirm the core items are ticked, especially that MicroG has the permissions it needs.
- Turn off battery optimization for MicroG: Settings → Apps → MicroG → Battery → Unrestricted (wording varies by brand). On Xiaomi, also check the autostart permission for MicroG so it is not killed after a reboot.
- If any permission toggle is greyed out, use the Restricted Settings step from Fix 1 — Allow restricted settings on MicroG’s app-info page — then grant it.
- Only then open MicroG → Accounts and add your Google account, and only then install the patched apps that depend on it. Our Morphe setup guide walks through that order, because installing the patched apps first is how people end up back at the same blocked screen.
One expectation to set correctly: none of this gives MicroG signature spoofing. Stock Xiaomi, Samsung, and Realme firmware does not support it, and ADB and Shizuku cannot add it. That is a ROM limitation, not an install failure — MicroG on stock firmware still handles account sign-in for patched apps without it. Do not let anyone sell you a “spoofing fix” for a locked stock phone; it requires a custom ROM or a patched framework, which is a much bigger decision than an install fix.
What ADB and Shizuku cannot fix
- A signature conflict. No installer, ADB included, can install over a different-signature build. Uninstall first, always.
- A system MicroG. If your ROM ships MicroG as a system app (for example LineageOS for microG), removing or replacing it from outside the ROM can break apps that expect it. Keep the bundled build and update it from the same source.
- A tampered or incomplete file. ADB will reject a corrupt APK just as firmly as the on-screen installer — correctly. Re-download from a trusted source instead of forcing it.
- Missing signature spoofing. See above. Install success and spoofing support are two different things.
Our verdict
For most Indian users on Android 14, 15, or 16, the right order is boring and it works: clear the per-app unknown-sources permission and the brand security toggle, then — if the on-screen installer still refuses — install once through ADB or Shizuku and read the actual error instead of guessing. ADB is the better first choice when a computer is available, because the error output is unambiguous. Shizuku is the genuine no-computer equivalent, not a workaround of a workaround: the pairing takes a few minutes the first time, and after that you have the same commands on the phone itself. What neither tool does is override Android’s real protections — signature rules and corrupt-file rejection stay in force, and that is a good thing, because those are the rules that keep a sideloaded phone safe.
Frequently asked questions
Is ADB safe? Will it root or void my phone?
No. ADB is Google’s own developer tool, and installing an APK through it does not root the phone or wipe data. It does give the connected computer powerful access, so only enable USB debugging for your own computer, only accept the prompt on a machine you trust, and turn USB debugging off when you are done.
Does Shizuku need root?
No. Shizuku uses wireless debugging, available on Android 11 and later, to give approved apps ADB-level access without root. On a non-rooted phone it stops at reboot, so you tap Start again after restarting — pairing itself usually survives.
Why does Android 14 block some old apps but not current MicroG?
Android 14 blocks installation of apps targeting below SDK 23 (Android 6.0), because old target levels dodge modern permission rules. Current MicroG builds target modern Android, so they are not caught by this rule. If a current file is blocked, the cause is almost always a permission, a brand security layer, or an old conflicting build — not the SDK block.
Can I use Shizuku instead of a computer for everything here?
For installing MicroG and reading the package-manager error, yes. The one thing Shizuku cannot do is fix a signature conflict or a corrupt file — those need an uninstall or a fresh download first, whichever method you use.
My phone says “device unauthorized” in ADB. What now?
Unplug the phone, go to Developer options and revoke USB debugging authorizations, then reconnect and accept the prompt on the phone itself. On Xiaomi, also check the “USB debugging (Security settings)” toggle — without it, ADB can see the device but still be refused.
After installing via ADB, MicroG still won’t sign me in. Is the install broken?
Probably not. Check the post-install steps: battery optimization off, Restricted Settings allowed, and the Self-Check items ticked. On stock firmware without signature spoofing, some features stay limited — but account sign-in for patched apps should work once permissions and battery settings are right.
Still setting up? Start from the MicroG homepage for the latest verified APK and the standard install steps.
1 thought on “Android 14, 15 & 16 Blocked Your MicroG Install? ADB & Shizuku Fixes”
Comments are closed.